Introduction to Step-by-Step Texture Wall Tutorials
Texture walls have gained popularity in the realm of interior design, serving as a means to enhance the aesthetic appeal of a space while adding depth and visual interest. The concept of texture walls revolves around applying various techniques and materials to create a three-dimensional effect on a flat surface. This transformative element in home decors not only elevates the overall look of a room but also encourages creativity and individuality in decorating.
One of the primary reasons homeowners opt for textured finishes is their ability to add character to a space. A flat, smooth wall may sometimes feel lifeless or uninspiring, while textured walls invite touch and admiration, making them a focal point in any room. Different textures can evoke various feelings; for instance, a rustic finish might bring warmth and coziness to a living space, while a sleek, modern texture could present a sophisticated vibe. Consequently, the choice of wall texture can significantly influence the mood and style of a home.
Additionally, DIY texture wall projects provide an excellent opportunity for personalization. Homeowners can experiment with different materials, patterns, and finishes to create a look that reflects their unique tastes and preferences. Engaging in such projects allows for a sense of accomplishment and ownership over one’s living environment. Furthermore, undertaking textured wall applications can be cost-effective, as it enables individuals to utilize their creativity and resourcefulness while bypassing the need for professional installations.
In the following sections, we will delve deeper into the various techniques and methods for achieving beautiful texture walls, highlighting both popular options and innovative approaches. This guide aims to empower readers to embark on their own texture wall endeavors with confidence.
Tools and Materials Needed
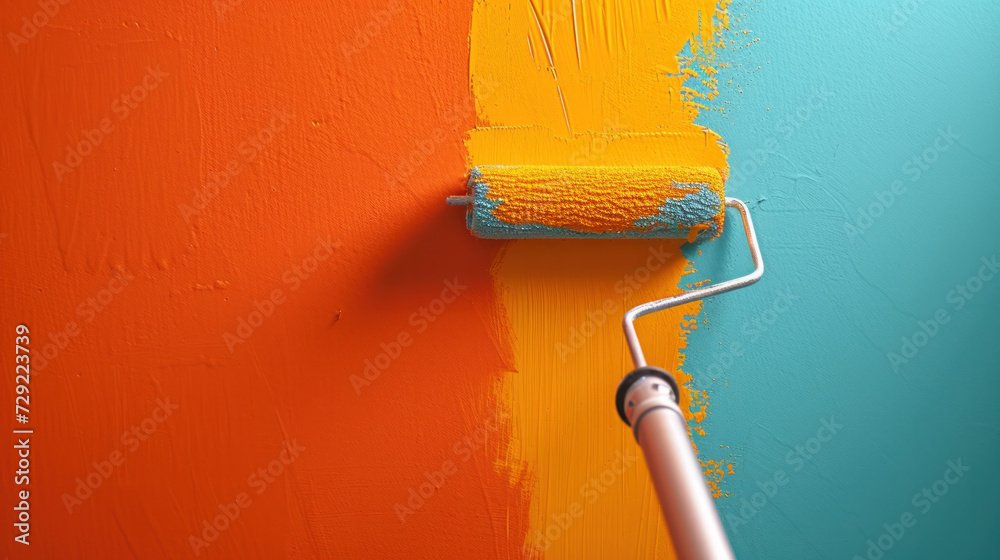
Creating textured walls requires a selection of essential tools and materials that cater to the design and texture type desired. To start, a good quality paint, specifically designed for textured finishes, is crucial. It is advisable to choose a paint that offers excellent adhesion and durability, as these factors significantly enhance the final appearance and longevity of the texture.
Next, texture tools such as brushes, rollers, and trowels are key in achieving different looks. For instance, a trowel can create stylish, layered textures, while a textured roller can effortlessly apply a uniform finish across a large area. It is also beneficial to have a variety of brushes on hand; these can enable the homeowner or decorator to experiment with different styles and details, enhancing the unique identity of the space.
Preparation is equally vital, and drop cloths will protect floors and furniture from paint splashes. Additionally, painter’s tape is essential for ensuring clean lines and defining edges around doors, windows, and other surfaces. Safety equipment, such as masks, goggles, and gloves, should not be overlooked. Using these items not only guarantees personal safety but also contributes to a more efficient work environment.
When selecting materials, consider the texture finish you aim to achieve. For example, if a stucco-like finish is desired, a thicker paint or a specific texturing compound would be required. Alternatively, for a smooth, subtle finish, a more fluid paint might be ideal. By understanding the different tool options and the types of textures available, homeowners can equip themselves effectively for their textured wall projects, ensuring that the results are both stunning and professionally executed.
Choosing the Right Texture Technique
When it comes to transforming your walls, selecting the appropriate texture technique is essential for achieving the desired aesthetic and functionality. Among the various texture methods, stucco stands out for its durability and traditional appearance. This technique involves applying a mixture of cement, sand, and lime, making it suitable for both interior and exterior walls. Its robust nature offers weather resistance, making stucco an excellent option for homes in diverse climates. However, installation can be labor-intensive and may require professional expertise, which is a factor to consider.
Sponge painting is another popular technique that allows for greater creativity in wall decors. This method involves applying paint with a sponge to create a subtle, textured effect. The beauty of sponge painting lies in its versatility; homeowners can choose contrasting colors to achieve a unique look. While this technique is relatively easy to apply, it may not be as durable as other methods, necessitating periodic touch-ups, especially in high-traffic areas.
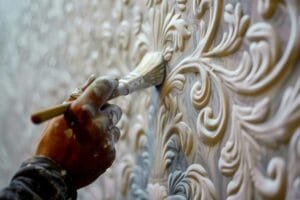
Drywall texture, often seen in modern homes, can take several forms, such as knockdown, slap brush, and orange peel. Each variety provides a distinct finish. Knockdown texture is particularly favored for its sophisticated look and smooth surface, drawing attention without overwhelming the decors. On the other hand, orange peel texture offers a more uniform surface that is forgiving of imperfections. Despite these advantages, drywall texture applications can be messy and often require a skilled hand to achieve a professional finish.
Ultimately, choosing the right texture technique depends on the homeowner’s preferences, the intended look, and the specific characteristics each method brings. By understanding the pros and cons of stucco, sponge painting, and drywall texture, readers can make informed decisions that align with their vision and complement their home decors style.

Preparation: Getting Your Wall Ready
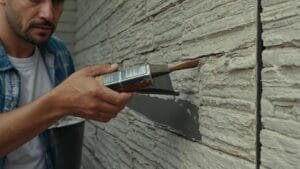
Before embarking on any texture wall project, proper preparation of the wall surface is crucial for achieving a successful finish. The first step in this process involves cleaning the wall thoroughly. This ensures that any dust, grease, or debris that could interfere with the adhesion of the texture is removed. A simple mixture of soap and water, along with a sponge or cloth, can effectively clean the surface. After cleaning, allow the wall to dry completely before proceeding to the next step.
In addition to cleaning, it is essential to inspect the wall for any imperfections such as cracks, holes, or peeling paint. Addressing these issues is vital, as they can affect the overall texture application. Small holes and cracks can be filled using putty or spackle, while larger imperfections may require patching with drywall compound. Once repairs are made, sand the surface lightly to create a smooth finish, ensuring that the repaired areas blend seamlessly with the rest of the wall.
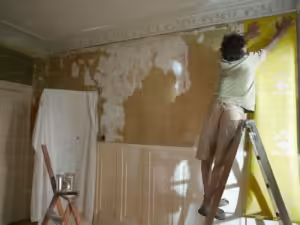
Another important aspect of preparation is protecting woodwork and flooring. Lay down a drop cloth or plastic sheeting to cover floors, furniture, and any adjacent surfaces that may be exposed to texture application. Additionally, tape off edges and trim using painter’s tape to create clean lines and prevent accidental splatters.
Finally, priming the wall is a critical preparatory measure. A suitable primer enhances adhesion, making it an indispensable step for successful application of textured finishes. Choose a primer designed specifically for the type of texture you intend to use, and apply it evenly across the wall following the manufacturer’s instructions. This thorough preparation will contribute significantly to the durability and appearance of your chosen texture finish.
Applying Texture: Step-by-Step Instructions
Applying texture to walls can significantly enhance the aesthetic appeal of any room. This step-by-step guide aims to provide clear and straightforward instructions for achieving a professional finish using various techniques.
Begin by preparing the workspace. Remove any furniture and cover the flooring with drop cloths to protect it from splatters. Next, ensure that the wall surface is clean, dry, and free from any nails or screws. It’s essential to patch any holes with spackling compound, allowing it to dry and sanding it smooth for a uniform surface.
Once the wall is prepared, gather your materials. Depending on your technique of choice, you may need texture compounds, sponges, brushes, or rollers. Carefully follow the manufacturer’s instructions for mixing the texture material. For instance, if you are using a premixed compound, you may need to thin it slightly with water to achieve the desired consistency.
To begin applying the texture, use a large roller or brush to spread a uniform layer of your texture mixture onto the wall. Work in sections to maintain control over the application and prevent the mixture from drying out prematurely. If you’re using a sponge or brush for a specific effect, dab or swirl it on the wet texture to create patterns as desired.
Maintaining uniformity is crucial in achieving a polished look. Keep an eye on the thickness of the texture and ensure that it is consistent throughout the wall. If any areas appear too thick or thin, make adjustments by adding or smoothing out the texture mixture. Allow this initial layer to dry fully before applying a second coat if needed.
Finally, always prioritize safety while working. Wear protective gear such as gloves and a mask to avoid inhaling fine particles. Good ventilation is key; keep windows and doors open or use fans to circulate air. Following these steps will guide you through the process of applying wall texture effectively and safely.
Finishing Touches: Paint and Decors
After applying the texture to your walls, the next crucial step is selecting the appropriate paint and decors to enhance the desired aesthetic. Textured walls offer a unique challenge and opportunity, as they can significantly alter how color appears. It is important to consider the type of paint used for such surfaces; some paints are specifically formulated to adhere well and provide an even finish on textured areas.
Acrylic latex paints are often recommended due to their versatility and durability. For deeper penetration into the textures, it may be beneficial to select paints with a higher viscosity. This ensures a more uniform coverage and reduces the risk of drips. Additionally, opting for a satin or eggshell finish can enhance the visual appeal, as these finishes can reflect light in a way that brings out the wall’s texture without overpowering the room.
For those looking to highlight specific textures, techniques such as dry brushing or color washing can be effective. These methods involve applying a lighter or slightly contrasting color over the base layer to accentuate the textured pattern. On the other hand, if the aim is to tone down the textures, selecting a monochromatic palate or applying a solid color that closely matches the undertone of the texture can create a more subdued appearance.
When it comes to decors, choosing elements that complement your textured walls can significantly enhance your space. Consider incorporating artwork, mirrors, or shelving that aligns with the wall’s texture and color scheme. This not only adds dimension but also draws attention to the unique finishes of the walls. By thoughtfully selecting paint colors and decors items, you can create a harmonious and inviting atmosphere that emphasizes your newly textured walls.

Maintenance and Care for Texture Walls
Maintaining textured walls is essential to preserve their beauty and ensure their longevity. Each type of texture requires specific care, making it crucial to understand how to clean and maintain them properly. For example, painted textured walls, such as those finished with a knockdown or stomped technique, can generally be cleaned using a soft cloth or sponge with mild soap and water. It is advisable to avoid abrasive cleaners or scrubbing pads, as these can damage the texture, removing not only the dirt but also the finish.
In addition to regular cleaning, homeowners should also pay attention to potential damages that might occur over time. For small cracks or blemishes, patching compounds can be used to restore the wall’s texture. First, it is important to clean the area around the repair and allow it to dry completely before applying the compound. Once the repair is finished, consider painting over the patched area to match the surrounding wall. Larger damage may require more extensive repairs or even consultation with a professional to achieve a seamless finish.
Reapplication of finishes may be necessary depending on the wall’s exposure to wear and environmental factors. It is advisable to inspect textured walls at least once a year to identify any signs of deterioration. If the surface is starting to appear dull or faded, a fresh coat of paint or a clear sealant can revitalize its look without compromising the texture. The longevity of texture wall projects largely depends on how well these surfaces are maintained. By implementing routine care, homeowners can ensure their textured walls remain a stunning feature of their living space for years to come.
Common Mistakes to Avoid
When embarking on a DIY project involving textured walls, it is vital to be aware of common mistakes that can hinder the overall quality and appearance of the finish. One frequent issue encountered by DIY enthusiasts is the improper mixing of materials. Texture compounds, such as joint compound or plaster, must be mixed according to the manufacturer’s specifications. Inadequate mixing can lead to inconsistencies in texture, affecting both application and drying time. Therefore, following the recommended guidelines for the appropriate proportions and mixing techniques is essential for achieving the desired texture.
Another mistake to be cautious of is the over-application of texture materials. It can be tempting to apply a thick layer in an attempt to achieve a dramatic effect; however, excessive application often leads to a finish that is uneven and prone to cracking. It is advisable to apply texture in thin layers, allowing each layer to dry thoroughly before adding another. This approach not only enhances the appearance of the wall but also minimizes the risk of errors that could necessitate time-consuming repairs.
Furthermore, neglecting wall preparation is an oversight that can severely impact the success of a textured wall project. Proper wall preparation includes cleaning the surfaces to remove dust, grease, or old paint, as well as repairing any flaws such as holes or cracks. A well-prepared surface allows for better adhesion and results in a more professional-looking finish. Investing time in preparation can significantly contribute to the longevity and aesthetic appeal of textured walls throughout your space.
By remaining vigilant and informed about these common pitfalls, DIYers can approach their texture wall projects with greater confidence. Avoiding improper mixing, over-application, and inadequate preparation will ultimately lead to more successful and visually pleasing finishes.
Inspiration and Real-Life Examples
Textured walls can drastically enhance the overall aesthetic of a space, providing depth, character, and an artistic touch. Throughout various residential and commercial environments, numerous examples illustrate the versatility and impact of textured finishes. From rustic charm to modern elegance, these inspiring settings showcase the myriad of possibilities available in transforming plain walls into captivating focal points.
In a contemporary living room, a bold geometric pattern created with a stucco finish introduces a playful yet sophisticated vibe. The sharp angles and contrasting colors draw the eye, making the wall a stunning backdrop for minimalist furniture. In a stark industrial loft, exposed brick walls coated with a light wash of white paint highlight the raw materials, adding warmth and personality without losing the authenticity characteristic of urban design.
Another remarkable example can be found in a cozy bedroom featuring a fabric-covered accent wall. Soft, plush textures invite relaxation and tranquility, creating a welcoming sanctuary. The careful selection of fabric color and pattern complements the bedding, demonstrating how textured finishes can harmonize with the overall theme of the room.
Further afield, a trendy café utilizes a combination of reclaimed wood and patterned plaster to evoke a sense of nostalgia while embracing environmental sustainability. The varied textures not only enhance the visual appeal but also contribute to the acoustic properties of the space, effectively managing noise level while patrons enjoy their meals.
Ultimately, these vivid examples exemplify the creative potential locked within textured walls. By experimenting with different techniques, colors, and materials, individuals can achieve unique, personalized results that reflect their style and elevate their environment. Whether through intricate patterns or simple, textured finishes, the key is to channel imagination and embrace the transformative power of textured wall designs.