Introduction to DIY Texture Painting
Mithila painting, also known as Madhubani art, represents a centuries-old tradition originating from the Mithila region of Bihar, India. This folk art form is characterized by intricate patterns, vibrant colors, and a deep connection to the cultural and spiritual life of the local communities. Traditionally, Mithila paintings were created by women on the walls of their homes to celebrate various religious and festive occasions, serving not just an aesthetic purpose but also a narrative function by depicting mythological themes and social messages.
The uniqueness of Mithila art lies in its distinctive style and subject matter. Artists typically use natural pigments derived from plants, minerals, and other organic elements that create a striking visual impact. The use of bold colors such as red, green, yellow, and blue reflects the rich natural surroundings and the cultural significance attributed to these hues. The patterns often include depictions of flora and fauna, divine beings, and scenes from daily life, all interwoven in elaborate compositions. This attention to detail and symbolic representation sets Mithila painting apart from many other art forms.
With its roots in tradition, Mithila painting has evolved over the years, embracing modern themes while retaining its essential characteristics. Its adaptability makes it an excellent choice for DIY home texture projects, as these vibrant paints not only offer a splash of color but also tell a story and resonate with the heritage. The techniques used in Mithila painting, such as fine brushwork and geometrical designs, can be applied creatively to interior spaces, enhancing their visual appeal and creating textures that speak of an artistic legacy. The authenticity and cultural significance of Mithila paints make them a remarkable medium for personal artistic expression in contemporary home décor.
Tools and Materials Needed
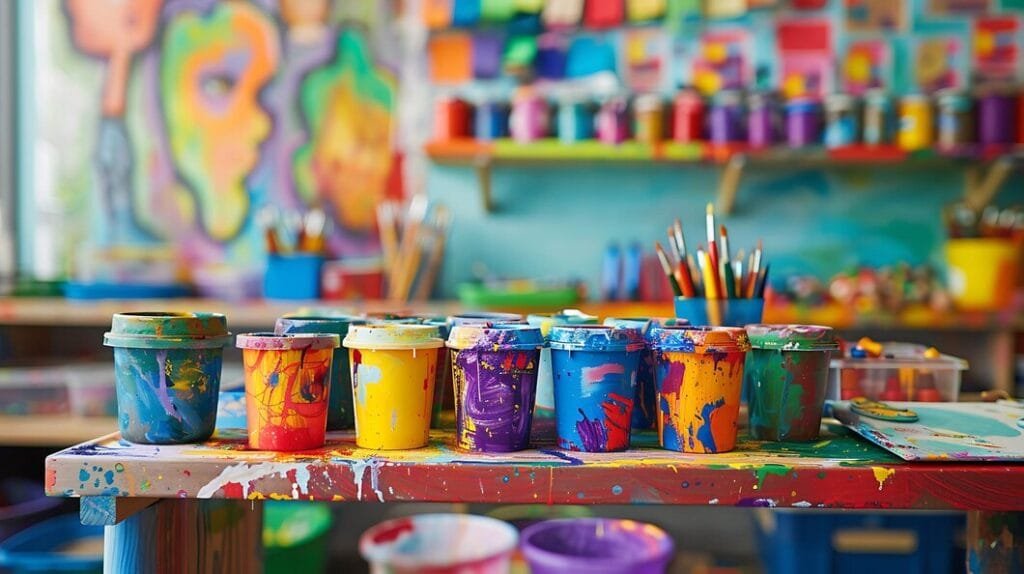
Engaging in the art of texture painting with Mithila paints necessitates a selection of specific tools and materials that facilitate creativity and enhance the overall outcome. Essential tools required for this form of artistic expression include brushes, sponges, palette knives, and rollers. Each of these serves a unique purpose in the painting process. Brushes are vital for fine details and intricate line work, while sponges can be employed to create softer textures and blends. Palette knives are excellent for applying thicker paint and generating interesting surface patterns, and rollers are ideal for covering larger areas swiftly.
In terms of materials, Mithila painting typically utilizes a range of colors derived from natural dyes or synthetic alternatives. High-quality acrylic or watercolor paints work well, given their vibrant hues and ease of use. When selecting paints, consider choosing products that offer good opacity and a satin or matte finish, as these will provide the desired aesthetic for texture applications. Furthermore, it is advisable to include additional materials such as textured surfaces—canvas, wood panels, or even paper specifically designed for mixed media art, enhancing the overall dimensionality of the artwork.
For DIY enthusiasts looking to source these materials, local art supply stores often carry a wide selection. Additionally, online retailers provide the convenience of home delivery, frequently offering bulk purchasing options that can be cost-effective. Thrift shops or recycling centers can also be treasure troves for unique items that can be repurposed as texture tools. Taking the time to gather the appropriate tools and materials is crucial, as they lay the groundwork for successful Mithila texture painting, allowing artists to fully explore their creative potential.
Preparing Your Space for Painting
When embarking on a texture painting project using Mithila paints, the significance of preparing your work area cannot be overstated. An orderly and protected workspace not only enhances creativity but also minimies the potential for damage and disarray. This initial step paves the way for a smoother and more enjoyable painting experience.
First, consider the environment where you will conduct your painting—whether indoors or outdoors. Indoor spaces provide the advantage of controlled temperature and lighting, crucial for achieving the desired texture and finish with Mithila paints. However, adequate ventilation is essential to ensure air circulation and to alleviate any odors produced during the painting process. In contrast, outdoor settings offer natural light and ample space, allowing for larger projects, but do keep weather conditions in mind to avoid disruptions.
After settling on a suitable location, it is vital to protect the floors and furniture in your workspace. Use drop cloths or newspaper to cover surfaces that may be at risk of spills or splatters. If painting indoors, be particularly attentive to furniture, as it can be challenging to clean paint off certain materials. Using painter’s tape can also mark off areas you want to avoid getting paint on.
Next, organizing your materials for easy access is paramount. Gather all necessary supplies close by, including brushes, palette knives, containers for mixing colors, and, of course, the Mithila paints themselves. Having everything in one place ensures you do not waste precious time searching for tools while in the creative flow.
In conclusion, a well-prepared space enhances your texture painting experience significantly. By selecting the right environment, protecting your surroundings, and arranging materials efficiently, you set the foundation for a successful project that highlights the beauty of Mithila paints.
Basic Techniques of Texture Painting
Texture painting is a captivating method that enhances the visual appeal of artworks by adding depth and dimension. At its core, texture painting involves a variety of techniques that allow artists to create unique surfaces and effects in their paintings. When working with Mithila paints, which are known for their vibrant colors and intricate designs, certain techniques can elevate the overall aesthetic of the artwork.
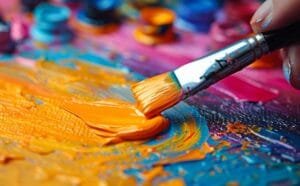
One of the fundamental techniques in texture painting is the use of brushes to lay down various textures. Artists can experiment with different brush types and sizes to achieve diverse effects. For instance, a stiff-bristled brush can create bold lines and strokes, while a softer brush can blend colors seamlessly. Utilizing a dry brushing technique, where a minimal amount of paint is applied, can also yield a textured finish, allowing the underlayer to show through.
Sponges are another versatile tool in texture painting. Dabbing a sponge into the paint and applying it to the surface produces a unique stippling effect that can simulate natural textures like stone or foliage. This method is particularly compatible with Mithila paints, which can be layered to create intricate patterns with varying opacity. Furthermore, artists can manipulate the sponge’s application to generate both subtle and bold textures based on their creative intentions.
Layering is a fundamental principle in texture painting. By applying multiple layers of paint or other materials, artists can achieve a rich and complex textured look. It is essential to allow each layer to dry before applying the next, enabling the colors to interact and blend harmoniously. Additionally, using tools like palette knives or combs can further enhance the texture, providing various patterns and effects that are characteristic of Mithila techniques.
Incorporating these basic techniques of texture painting not only enriches the artwork but also allows for personal expression. By experimenting with different tools and methods, artists can develop their unique styles, making each piece a testament to their creativity and skill. The joy of texture painting lies in the endless possibilities it presents for artistic exploration.

Incorporating Traditional Patterns and Motifs
Mithila painting, a folk art form hailing from the Mithila region of India, is renowned for its intricate patterns and vibrant colors. Infused with cultural significance, these traditional designs often depict natural elements, mythological themes, and religious iconography. To successfully incorporate these motifs into your DIY projects, understanding their traditional roots and symbolic meanings is crucial.
One cannot overlook the iconic Madhubani patterns, characterized by their geometric shapes, floral designs, and expressive figures. For a refined touch, consider utilizing the ‘fish’ motif, which symbolizes fertility and prosperity. This can enhance various decor styles, linking each piece to a deeper narrative. Likewise, ‘peacock’ motifs, epitomizing grace and beauty, could be incorporated into wall art or decorative panels to evoke a sense of Indian heritage in contemporary interiors.
The ‘lotus’ design is another popular option, representing purity and enlightenment in Mithila art. By integrating lotus patterns into ceramic vase designs, one can create a stunning centerpiece that marries traditional aesthetics with modern functionality. Additionally, repetitive patterns, such as spirals and dots, can serve to create a harmonious flow in larger surfaces like murals or fabric wraps, bringing a motif-driven dynamism to the space.
Furthermore, consider blending these traditional patterns with contemporary styles; a minimalistic approach with a single, striking Mithila design can create a powerful focal point in any room. Explore various mediums such as fabric, wood, or canvas, ensuring that the chosen patterns exemplify the spirit of Mithila art, while still resonating in a modern context. Through the thoughtful execution of these motifs, one can deliver both beauty and cultural authenticity in their DIY projects.
Creating Texture on Different Surfaces
Mithila painting, recognized for its intricate patterns and vibrant hues, offers diverse opportunities for creative expression on various surfaces. Understanding the unique properties of each surface can significantly enhance the quality of texture that can be achieved, thereby transforming ordinary items into extraordinary works of art.
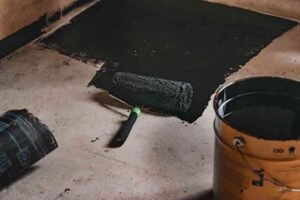
Walls are perhaps the most common surfaces to apply Mithila paints. When preparing walls, it is imperative to start with a clean and smooth surface. Applying a base coat of acrylic gesso helps in enhancing the adhesion of the paint. Once the surface is prepared, artists can employ techniques such as layering, stippling, or sponging to add depth and texture. These methods allow for the creation of stunning wall murals that can serve as focal points in any room.
Furniture is another intriguing medium for Mithila artistry. For wooden pieces, sanding down the surface ensures better paint absorption. After applying a primer specifically formulated for wood, artists can experiment with various techniques such as creating raised textures using stencils and molds. This approach not only beautifies the furniture but also protects the underlying material from wear and tear.
Canvases offer the flexibility for different textures through the use of various tools like palette knives and brushes. Incorporating mediums like modeling paste can enhance the texture further, enabling artists to create three-dimensional effects that engage the viewer. When working on decorative items such as clay pots or metal trays, it’s essential to select the right primer to ensure durability while maintaining the visual appeal of the Mithila designs.
Each surface presents unique challenges and opportunities. By understanding how to properly prepare these surfaces and applying techniques tailored to them, artists can fully embrace the rich tradition of Mithila painting, bringing depth and texture to their creations.

Color Combinations and Their Effects
Color plays a pivotal role in the realm of Mithila painting, shaping both the visual appeal and emotional response elicited from viewers. When engaging in creative DIY texture painting, understanding how different colors interact can significantly enhance the overall aesthetic of the artwork. By carefully selecting and combining colors, artists can create dynamic texture effects that resonate with the essence of Mithila art.
One effective approach to color selection is to consider complementary color schemes. These schemes utilize colors that are opposite each other on the color wheel, creating a vibrant contrast that immediately attracts attention. For example, combining deep reds with fresh greens can produce a striking balance, where the richness of the red amplifies the vivacity of the green. This synergy not only enriches the visual experience but also intensifies the texture variations applied in the painting.
Analogous color schemes, which consist of colors adjacent to each other on the color wheel, offer a more harmonious and unified look. A palette featuring blues, greens, and yellows can evoke feelings of tranquility while allowing textural elements to stand out without overwhelming the viewer. This approach encourages fluid transitions between colors, accentuating the intricate patterns typical of Mithila artwork.
Mixing colors effectively is another critical skill for artists. By mastering techniques such as layering and blending, one can create unique hues that contribute to the desired textural effects. For instance, layering light and dark shades can create depth, making textures more pronounced. Successful color combinations, such as vibrant oranges with cooler blues for an autumn theme, can lead to breathtaking results, drawing viewers into the narrative of the painting.

Showcasing Your Finished Projects
Once you have completed your texture painting projects using Mithila paints, it is essential to display them in a manner that enhances their visual appeal and showcases your artistic efforts. One effective way to present your artwork is through framing. Choosing a frame that complements the colors and style of your painting can elevate its appearance dramatically. Opt for frames with intricate designs that mirror the details in your Mithila artwork, or select minimalist frames that allow the vibrant textures and patterns to take center stage.
For those who have painted furniture pieces, consider arranging them in a prominent area of your home. A well-painted chair or table can serve not only as functional furniture but also as a focal point in your decors. When displaying these items, ensure that they are positioned in a way that highlights their unique textures and colors. Placing them against neutral backdrops allows their vivid patterns to pop, creating an eye-catching contrast.
Additionally, smaller decorative items painted with Mithila designs can be grouped together to form an appealing display. Create a dedicated shelf or vignette that features these items, using varying heights and sizes to add visual interest. Consider layering textures by incorporating materials such as woven baskets or natural elements, which will complement the painted pieces and create a cohesive design theme within your home décor.
By thoughtfully displaying your completed projects, you can not only appreciate your creative endeavors but also inspire others with the beauty of Mithila paints. Combining colors, textures, and artistic flair will enhance your living space and provide a glimpse into your personal style. The right arrangement and presentation can transform everyday items into extraordinary decors pieces that resonate with your artistic spirit.
Conclusion and Inspiration to Continue Creating
Engaging in DIY texture painting projects with Mithila paints offers a unique blend of creativity and cultural appreciation. As we reflect on the joy derived from these artistic endeavors, it becomes evident that such projects are not merely about crafting beautiful pieces of art but also about embracing and celebrating tradition. The intricate designs and vibrant colors characteristic of Mithila painting allow artists to express their individuality while respecting a rich heritage that has flourished for centuries.
Participants in these creative activities often find personal satisfaction that extends beyond the completed artwork. The process of mixing colors, applying layers, and experimenting with various textures fosters a sense of accomplishment and encourages self-expression. This journey into the world of Mithila painting can be a meditative experience, enriching the mind and spirit as one engages in the art form. Each brushstroke tells a story, creating a connection not only to oneself but also to the broader community of artists who share this cultural legacy.
We encourage readers to continue exploring their creative potential. Don’t hesitate to share your DIY texture painting projects with friends, family, and the wider community, as artistic expression can inspire others to embark on their creative journeys. Consider innovating with new techniques and hybrid styles, merging traditional Mithila patterns with modern elements or integrating different mediums. By doing so, you can contribute to the evolution of this ancient art form while nurturing your own creativity.
In conclusion, the world of Mithila painting offers endless possibilities for exploration and expression. As you delve into your next DIY texture painting project, remember that each creation is not just a piece of art but a celebration of cultural heritage and personal growth. Happy crafting!
