Introduction to Budget-Friendly Texture
Texture painting has emerged as a significant trend in the realm of home decors, providing homeowners with an innovative way to enhance the aesthetic appeal of their living spaces. This artistic technique involves applying layers of paint, texture mediums, or tools to create a visually dynamic surface. Such projects not only invigorate a room’s ambiance but also inject personality and character, making it a vital aspect of interior design.
The importance of texture painting lies in its ability to transform a plain and uninspiring wall into a captivating focal point. By utilizing a variety of texture painting techniques — such as sponging, rag rolling, or stucco — homeowners can introduce depth and interest. These methods allow for creative expression, enabling individuals to craft unique visual effects that reflect their personal taste and style. Moreover, texture painting can camouflage wall imperfections, thus offering a practical solution for maintaining the integrity of home surfaces.
In addition to enhancing visual appeal, the benefits of texture painting extend to its affordability. Compared to fully renovating a space or purchasing expensive decor items, texture painting projects can be executed on a budget, making them an accessible choice for many homeowners. By simply investing in some basic supplies and dedicating a little time to the project, individuals can achieve remarkable results without breaking the bank. This cost-effectiveness positions texture painting as a smart choice for those looking to rejuvenate their homes affordably.
Ultimately, texture painting presents a unique opportunity to refresh and elevate domestic environments. By exploring various techniques and embracing the creative potential of such projects, readers can embark on an exciting journey towards transforming their spaces into inviting and stylish havens.
Choosing the Right Materials
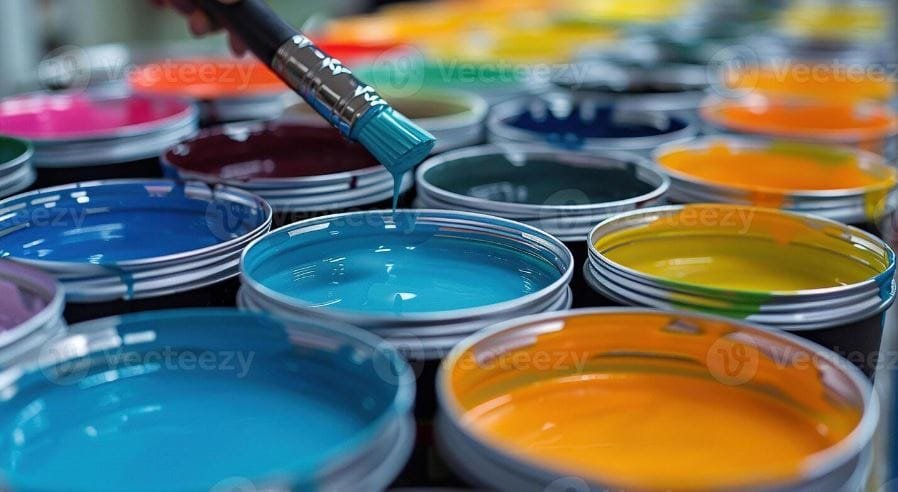
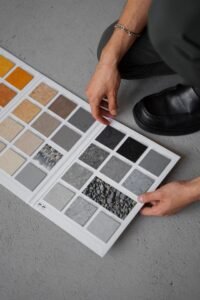
When embarking on a texture painting project, selecting the right materials is crucial for achieving a successful outcome while remaining budget-conscious. The primary components that you will need include quality paints, brushes, sponges, and texture additives. For the paint, consider opting for latex or acrylic options, as these types are not only versatile but often more affordable than specialized paints. These choices also facilitate easy cleanup, making them perfect for DIY projects.
The selection of brushes plays a significant role in the outcome of texture painting. Synthetic brushes are typically less expensive and suitable for various paints. It is advisable to invest in a set that includes different sizes and shapes to facilitate the creation of various textures. Sponges are another essential tool; they allow the artist to dab or blend paints easily. Look for inexpensive options at local craft stores, or even at household goods retailers, where kitchen sponges often make for exceptional texture tools.
Texture additives may significantly enhance your projects, creating depth and unique design elements. Many budget-friendly brands offer these additives without compromising quality. Be sure to check the labels for compatibility with your chosen paint type. Additionally, there are a variety of places to source your materials; local hardware stores often have sales, while online marketplaces can provide competitive pricing and exclusive deals on bulk purchases.
By carefully selecting materials for your texture painting projects, you can balance quality with affordability. The right tools will empower you to unleash your creativity while keeping expenses low. Therefore, take the time to explore your options, and do not hesitate to shop around for the best prices on the essential items needed for your project.
Basic Texture Painting Techniques
Texture painting is an excellent way to add character and depth to your walls without incurring significant expenses. Beginners can explore various techniques, including sponge painting, rag rolling, and using stencils or combs. Each of these methods is relatively simple and can be completed with minimal supplies, making them budget-friendly options for transforming your space.
One of the most popular methods is sponge painting, which creates a soft, mottled effect. To begin, gather materials such as a natural sponge, paint, and a roller. Start by rolling a base coat onto the wall and allowing it to dry completely. Once dry, dip the sponge into a contrasting color and gently dab it onto the wall in a random pattern. This technique can be customized in terms of color and intensity, resulting in a unique texture that can complement your existing decor.
Rag rolling is another technique that provides a rich texture. For this method, you will need a rag, a paint roller, and two colors of paint. First, apply your base coat with the roller and wait for it to dry. Next, dip the rag in the second color and roll it across the wall to create the desired look. By varying the pressure applied while rolling, you can achieve different effects that can enhance any room.
Using combs or stencils adds another layer of creativity to texture painting. With a comb, you can create lined patterns by dragging the comb through wet paint on the wall. Stencils can be applied once the base coat has dried; simply place the stencil on the wall and use a sponge or brush to apply paint over it. Both of these techniques allow for intricate designs, perfect for those looking to make a bold statement.
Creative Project Ideas for Every Room
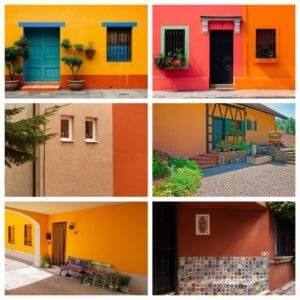
Texture painting offers a versatile and budget-friendly approach to home decor, allowing homeowners to infuse character and individuality into various spaces. Whether you are looking to refresh a living room, bedroom, or kitchen, several convenient texture painting techniques can elevate your design while remaining cost-effective.
In the living room, consider implementing a sponging technique for a subtle background effect. This method involves applying a base color and then layering a different shade using a damp sponge. It creates a soft, textured appearance that can serve as an attractive feature wall, enhancing the ambiance without requiring extensive renovations. Alternatively, a rag rolling technique can add depth and dimension, perfect for creating a cozy space where family and friends can gather.
When it comes to bedrooms, a more serene and personal environment is often desired. A simple ombre technique can introduce gentle shifts in color, creating a peaceful retreat. By blending two or more shades of a calming color, like soft blues or greens, you can turn your bedroom into a serene sanctuary. Moreover, a textured stencil method, using designs that resonate with your personal style, can add whimsical or sophisticated elements to the decor, making the space distinctly yours.
For kitchens, where functionality meets aesthetics, a faux finish can be particularly striking. Consider a stone or stucco finish using acrylic paint to mimic the look of genuine materials, providing an elegant yet rustic touch. This project can easily be done on a backsplash or an accent wall, giving your kitchen a distinctive flair while remaining budget-friendly. Also, using a comb texture painting technique can introduce subtle patterns in bold colors, creating a lively atmosphere suitable for cooking and entertaining.
Overall, these texture painting project ideas can help transform any room into a stylish haven while staying within your budget, proving that creativity doesn’t have to come at a high cost.
Tips for Effective Texture Application
Applying texture paint can significantly enhance the aesthetic appeal of your walls without breaking the bank. To achieve the best results, begin with proper surface preparation. Ensure that walls are clean, dry, and free from any imperfections. Patch holes and cracks with a suitable filler, and sand the surface smoothly to facilitate better paint adhesion. A well-prepared surface not only allows for a seamless application but also ensures durability over time.
Layering techniques play a crucial role in the texture painting process. It is advisable to start with a base coat that complements your chosen texture. Commonly used tools for texture application include sponges, brushes, and rollers, each contributing to varied finishes. For example, sponges are excellent for creating a soft, subtle texture, while brushes can produce more pronounced effects. Experimenting with these tools on a sample piece can give you a clearer idea of how different methods affect the texture and overall appearance.
When applying texture paint, consider the thickness and consistency of your mixture. A thicker paint can create more defined textures, while a thinner mix may yield softer results. Always apply the paint in light, even coats, allowing each layer to dry thoroughly before adding additional layers. This practice helps prevent any running or clumping, leading to a more professional finish.
Lastly, avoid common pitfalls such as rushing the preparation process or applying too much texture paint at once. Taking your time and being mindful of these tips will ultimately help you achieve a beautiful textured finish that enhances your space while remaining budget-friendly. With the right approach, your textured walls can reflect both creativity and sophistication.
Incorporating Color Schemes
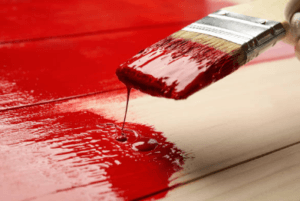
Choosing the right color scheme is vital in any texture painting project, as colors significantly influence the mood and aesthetic of a space. Fundamental to this process is understanding basic color theory, which categorizes colors into primary, secondary, and tertiary groups. Primary colors, such as red, blue, and yellow, can be combined to create a diverse array of shades that add depth to your texture painting. Familiarizing oneself with the color wheel can facilitate the selection of complementary and analogous colors, which work harmoniously together.
To create a cohesive and inviting atmosphere, consider incorporating a layered color palette. Start with a base color that evokes the desired ambiance for your room—warm tones like reds and oranges can create a cozy feel, while cool tones such as blues and greens often instill tranquility. Adding texture through tools such as sponges, brushes, or rags can enhance these chosen colors, giving the walls visual interest without necessitating an expensive paint job. For instance, a soft blue base can be paired with a textured white overlay, reminiscent of soft clouds, offering an elegant and soothing appearance.
Additionally, one can explore the idea of using a monochromatic scheme, which utilizes variations of a single hue. This method is not only budget-friendly but also allows for flexibility in texture application, creating a harmonious backdrop that can complement various furnishings and decor styles. When incorporating textiles and accessories into the space, aim for color coordination to unify the overall aesthetic. Fabrics, art pieces, and even furniture can reflect your chosen palette, enhancing the unique qualities of your textured walls without the need for excessive spending.

DIY vs Professional Help
When it comes to texture painting, individuals often face the dilemma of whether to undertake the project themselves or to enlist the services of a professional. Each option carries its advantages and disadvantages that can significantly influence the outcome of your project and overall budget. DIY texture painting projects can be quite appealing for those who have a limited budget or a passion for hands-on work. They allow homeowners to exercise creativity and customize their space to their personal tastes without incurring labor costs. By using readily available materials and tools, individuals can save significantly while enjoying the satisfaction of completing the task themselves.
However, DIY projects require a level of skill and time commitment that not everyone may possess. Beginners may encounter challenges in achieving the desired texture or finish, leading to dissatisfaction with the final result. Moreover, the time spent learning techniques and performing the work can be substantial. This can detract from other obligations, making it vital to analyze whether your schedule allows for such an undertaking. In some cases, the initial savings from a DIY approach could be overshadowed by potential mistakes that necessitate additional costs for repairs or corrections.
On the other hand, hiring a professional for texture painting projects can relieve homeowners of the burdens associated with complex techniques and labor-intensive work. Professionals bring expertise and experience, ensuring that the project adheres to high standards of quality. They are often familiar with various texture painting styles and can effectively recommend the best approach for your specific aesthetic goals. Although hiring a professional incurs added costs, it can prove worthwhile, particularly for larger, more complex projects or in cases where the flawless execution of materials is crucial. Ultimately, the choice between DIY and professional help should carefully consider both budget constraints and the scope of the painting project at hand.
Maintaining and Caring for Your Textured Walls
Textured walls can add significant character and beauty to any room, but like all home elements, they require proper maintenance to preserve their appeal. To keep your textured walls looking fresh and vibrant, it is crucial to adopt a regular cleaning regimen. Start by using a soft-bristle brush or a vacuum cleaner with an upholstery attachment to remove dust and debris. This prevents allergens from settling in the textures and maintains a clean appearance. For more stubborn stains, a damp sponge with a mild detergent can be beneficial. Always test the cleaning solution on a small, inconspicuous area to avoid discoloration.
In addition to routine cleaning, touch-ups are an essential part of wall maintenance. Over time, minor imperfections may appear due to wear and tear. For flat-textured surfaces, you can use a small artist’s brush to apply matching paint to the affected areas. Always keep leftover paint from your initial project, as this can be crucial for ensuring color consistency. If your textured wall features protruding elements, consider using a textured spray can which can provide a uniform finish, seamlessly blending the repairs into the existing wall.
Preventative measures are equally important to prolonging the life of your textured walls. Applying a sealant or protective coating may be beneficial, especially in high-traffic areas or spaces prone to moisture, such as kitchens and bathrooms. Regularly assess the wall for signs of damage or wear and make necessary repairs promptly. This proactive approach will not only enhance the longevity of your beautiful textured surfaces but also retain their vibrancy for years to come.

Inspiration from Real-Life Projects
Transforming a space through budget-friendly texture painting can seem daunting, yet countless homeowners have undertaken this rewarding task, showcasing the impressive results that can be achieved without extensive financial investment. By exploring several real-life examples, we can gain insight into the creative possibilities that arise when individuals embrace texture painting techniques.
One remarkable case comes from the Smith family, who revitalized their living room using a sponge technique with an earthy palette. Initially burdened by bland, white walls, they opted for a gentle green base coat and applied a brown sponge faux finish. This simple yet effective method breathed new life into their space, enhancing its warmth and inviting atmosphere. The Smiths reported their thrill at achieving such a dramatic change and the affordability of their choice, proving that texture painting can indeed be both cost-effective and visually stunning.
Another inspiring project was completed by the Johnsons, who took on their dated hallway. They decided to experiment with a stucco finish, which concealed imperfections while adding character. Using an inexpensive roller and a mix of paint and exterior texture compound, they created an appealing look reminiscent of Mediterranean villas. The Johnsons documented their process through a series of before-and-after photos, illustrating the substantial transformation and emphasizing that creativity often yields gratifying results without breaking the bank.
These examples illustrate the wide-ranging impact of texture painting on home aesthetics, showcasing versatility and personalization. Budget-friendly solutions can yield significant transformations in various settings. Homeowners who embark on similar projects often highlight key takeaways: proper preparation is vital, experimenting with textures can lead to unique outcomes, and undertaking these artistic endeavors not only beautifies spaces but also empowers individuals creatively. Such inspiring stories affirm that texture painting projects can be a practical and accessible route to achieving an aesthetically pleasing home environment.
